The fully digital Pro Arch protocol
A clinical case report by Luis Cuadrado de Vicente, Andrea Sánchez Becerra, Cristina Cuadrado Canals (i2 Implantología Center, Madrid, Spain)
About Luis Cuadrado

Luis Cuadrado
MD, DMD
Plastic, reconstructive and esthetic surgeon. Director of Clinical Training Center i2 Implantología. Director of Postgraduate Training Program in Implantology UDIMA, University of Madrid. Member of AO, EAO, SEI, SECIB, SECPRE, ITI. Over 200 national and international courses and conferences. More than 100 scientific articles. Practice in oral implantology, extraoral and reconstructive surgery. Member of the 3Shape World Advisory Board.
About Andrea Sánchez

Andrea Sánchez
MD
Degree in dentistry from the Universidad del Zulia, Venezuela. University degree in Clinical Implantology, University UDIMA. TRIOS 3 and Design Studio specialist by 3Shape and i2 Implantología. Sales department support technician and trainer in GO3D.
About Cristina Cuadrado

Cristina Cuadrado
MD
Degree in Dentistry from the European University of Madrid, Master in Advanced Oral Implantology by European University of Madrid. Co-author of several articles on Implant Dentistry, Prosthodontics and Oral Surgery. Oral Communication at the Third Congress of Implantology EMU-NYU. Professor, degree in Clinical Implantology, University UDIMA.


Introduction
The Straumann® Pro Arch concept involves different treatment solutions for the fully edentulous patient. The objective is to provide a predictable, reproducible and simple treatment that restores patients’ oral health and consequently improves their quality of life dramatically.
The possibility of immediate, same-day rehabilitation by means of temporary fixed prostheses offers maximum treatment quality and satisfaction, for both the dental team and patient.
The objective of the treatment with an immediately loaded fixed prosthesis on implants is to improve the patient’s quality of life by providing function, esthetics and health until osseointegration is established.
Thanks to the fully digital workflow that starts with the use of an intraoral scanner, the work team is able to offer a treatment of extreme precision in a simple way. This marks the beginning of a complete digital treatment right up to the final prosthesis. This could be considered as a new form of implantology in which the different elements of treatment are optimized to obtain a spectacular result.
With this objective in mind, in i2 we have developed a number of solutions and protocols covering the different clinical situations in fully edentulous patients, and based on classical implantology principles, to obtain predictable and reproducible results, with the use of the intraoral scanner as the principal element.
Our protocols include the use of certain elements (adequate implant, Osstell, etc.) and action protocols for scanning, surgical and prosthetic procedures and laboratory operations, including the production and maintenance of the provisional prosthesis.
In this case report, we present the i2 Standard protocol. This can be applied to patients requiring the removal of terminal dentition. In summary, this involves selected extractions, implant placement, intraoral digital impressions and the design and production of the temporary fixed prosthesis in PMMA, with placement in the patient on the same day.
It is important to note that our fully digital protocol to reach the final prosthesis is based, if needed, on the production of subsequent different temporary prostheses until osseointegration is established. We will modify the initial design (and produce further temporaries) always according to a fully digital approach, in order to obtain the final mock temporary prosthesis that fulfils the functional and esthetic parameters in our patient. The information provided by this final mock temporary will be copied onto the final prosthesis design. A trained dental team, clinic and lab is mandatory.
Initial situation
A 68-year-old patient with no medically relevant history and hopeless dentition was referred by his periodontist. A panoramic X-ray and dental CT were recorded to evaluate the bone availability, disposition and density (Figs. 1,2). After the different treatment options were discussed, and in view of the patient’s overall dental, social and economic situation, an implant treatment with a same-day fixed temporary restoration was the first choice for both the dental team and the patient.
Treatment planning
The goal was to load the implants immediately with a fixed screwed temporary prosthesis. To achieve this, the strategic extraction of some dental elements was planned with the temporary preservation of those key elements which, in the intraoral scanning, give us the patient’s esthetics, vertical dimension and prosthetic arch. We decided to perform minimally invasive surgery, where possible, with a flapless technique to avoid any mobile tissue that could affect intraoral scanning. The placement of six Straumann® Bone Level Tapered, Roxolid®, SLActive® implants with screw-retained abutments (SRAs) was planned for the restoration.
Surgical procedure
Before starting the surgery, a first study model scan was obtained with the intraoral scanner and sent to the lab as the patient’s original file (File 1). This file contained the all the information concerning the patient’s preoperative situation, including teeth, esthetics, vertical dimension and occlusion (Fig. 3).
The surgery was performed under local anesthesia and patient monitoring by an anesthesiologist using conscious intravenous sedation with midazolam and pulse oximetry monitoring.
Removing failing teeth was the first task, keeping in place those teeth with less mobility and in strategic positions to maintain antagonist contacts, and trying to keep the same preoperative bite (Fig. 4).
Extraction sockets were fully debrided with a bur to remove all the granulomatous tissue. Gum trimming was also performed on those gingival parts with deep pockets. Cleaning with hydrogen peroxide and saline was the final step, obtaining fresh places to receive any previously selected implants.
Keeping in mind the bone anatomy, availability and expected density, the final implant locations were selected and the implant beds were prepared at 800 rpm with continuous saline irrigation. The implant beds have to be prepared such that parallelism is maintained between all the implants.
When placing tilted and/or non-parallel implants, the preparation angle should be either 17 or 30 degrees to match the available SRA custom angulation. Accordingly, the dentist is constantly striving for the least divergent implant preparation, drilling at 0, 17 or 30 degrees. The Pro Arch guide is very useful for this purpose.
Furthermore, undersized drilling with continuous bone density assessment according to the operator’s own experience is mandatory to achieve the highest insertion torque, taking account of the biological bone situation and the mechanical properties of Roxolid®.
In this case, six implants (Straumann® BLT, Regular Neck, Roxolid®, SLActive® 4 x Ø 4.1 mm and 2 x Ø 4.8 mm) were placed with the handpiece at 45 Ncm, with a final manual setting and monitoring of the insertion torque (Figs. 5,6).
Careful orientation of the Loxim™ orientation marks is mandatory to maintain the desired parallelism of the SRA prosthetic screws.
After final implant seating, BLT type 54 Smartpegs from Osstell were placed on each implant, and the ISQ level was measured and recorded at implant connection level. Values between 75 and 85 out of 100 were obtained, confirming the immediate loading possibility on all the implants (Figs. 7,8).
SRA abutments were connected to all the implants: 2 x 17º Type A angulated SRAs were placed on anterior implants to correct the angulation for immediate prosthetic rehabilitation. Straight SRAs were placed on the remaining implants (Fig. 9). New ISQ levels were measured at abutment level using the convenient BLT SRA Type25 Smartpeg. It is important to record the ISQ level at implant and abutment level in the surgery so that the values can be extrapolated in the future Osstell readings at SRA level.
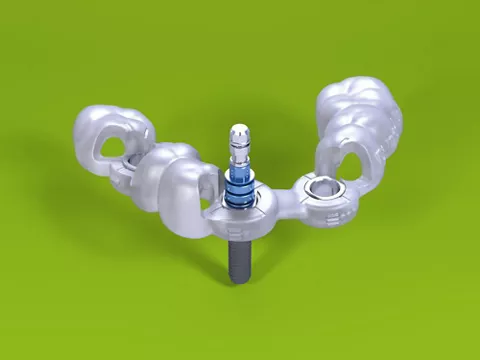
To obtain the final intraoral surface scan, original Straumann SRA scan bodies were connected to the SRA under visual control (Fig. 10).
A new intraoral scan was taken to record the patient’s current oral situation, showing the scan bodies and the preserved strategic teeth. This file (File 2) was also sent to the lab (Figs. 11,12). When the lab confirmed receipt of both files, the preserved teeth were extracted and healing caps placed on the abutments, completing the surgery.
Prosthetic procedure
On receipt of the scan body file (File 2), the lab imported it into 3Shape’s Dental System and created a virtual model, matching the virtual SRA scan bodies from Straumann’s original library with the intraoral SRA scan bodies (Figs. 13,14). A working file was created for designing the temporary prosthesis emergence profile for the SRA.
To perform the design of the temporary full arch and maintain (or modify) vertical dimension and occlusion, the patient’s pre-preparation study model scan file (File 1) was imported as a pre-preparation scan (blue) and merged with the implant file scan (File 2), using the preserved teeth present on both scans. The software allowed us to mark the same points on the preserved teeth on both files, the study model scan and the implant scan (both contained the preserved teeth). Thus, the lab was able to work on a single file containing both files, 1 and 2, merged by means of the preserved teeth.
Designing the temporary prosthesis is an easy task, using the image of the patient’s own teeth as a mock to be copied (Fig. 15). Any design modification can easily be done (Figs. 16,17).
Finally, the designed temporary was sent to the milling unit and produced on a convenient PMMA disc (TelioCAD, Ivoclar-Vivadent), resulting in a perfect full-arch bridge about two hours later. In this case, using SRAs, a monolithic TelioCAD bridge was produced without any Variobase® for SRA. Final temporary production steps included characterization and polishing (Fig. 18).
Returning to the patient, healing caps were removed (Fig. 19), and the prosthesis was placed allowing for a passive fit on the abutments, with an initial handpiece tightening of each SRA screw to 5 Ncm. After the seating was checked, the torque of each SRA screw was increased, also with the handpiece, to 35 Ncm (Fig. 20). Occlusion was checked and contacts were inspected (Fig. 21). Screw holes were sealed with PTFE and a temporary filling material.
A panoramic X-ray was recorded, and SRA screw positions were evaluated to confirm the perfect temporary bridge fit (Fig. 22). The patient was discharged on amoxicillin 500 mg/8 hr and dexketoprofen 25 mg /12 hr for one week. Oral hygiene and diet instructions were given, and a one-week follow-up appointment was scheduled.
Treatment outcomes
Bearing in mind that this is a one-day treatment, the overall treatment time per jaw is about 3 to 4 hours from the beginning to the end of the procedure. With this minimally invasive protocol, postoperative pain, swelling and discomfort are minimal. Patients are able to recover their health and social life immediately, without the psychological and social impairment associated with longer classical procedures.