#Immediacy 21. Oct 2022

Rehabilitation of hopeless mandibular incisors with immediate implant placement and provisionalization using a digital workflow

A clinical case report by Dr. Jeanette Chua, Malaysia

Immediate implant placement and provisionalization have become the norm, especially for the anterior teeth. These approaches offer many advantages for the patient and clinician, and they are considered predictable treatments with comparable implant survival rates to conventional loading protocols. Moreover, they have also been linked to reductions in patient discomfort, chair time, and material.

Introduction

However, the pre-surgical wax-up preparation, surgical guide, and provisional preparation can be time-consuming and arduous, mainly if the clinician does not have an in-house dental technician or is not well aligned with the lab. On this matter, digital workflows have changed the way we perform immediate treatments nowadays.

Digital dentistry has been improved with technology through the development of software and computerized tomography to enable virtual planning and to guide the surgery toward a specific target precisely. Digital dental implant planning enables a prosthetically driven approach, resulting in better results in terms of the prosthesis design, aesthetics, and occlusion, eliminating the shortcomings and minimizing the misfit of the conventional lab work, among other advantages.

The following case report demonstrates the time chair-time saved and the improved patient comfort when we digitize. Moreover, digital scanning replacing conventional impression-taking created less trauma on the surgical site, thus improving the patient’s experience. Furthermore, 3D printing reduced the cost and time needed for provisional fabrication and allowed an accurate fitting.

Initial situation

A 58-year-old male, who reported being a former smoker for 40 years (10 cig/day), with no medication, or allergies, came to our clinic; and expressed, “I cannot bite with my lower front teeth anymore without hurting. I would like to find a more permanent solution. Not being able to chew has affected my lifestyle tremendously”. In addition, his expectations included a fixed and minimally invasive solution, as he didn’t want to spend a day without teeth.

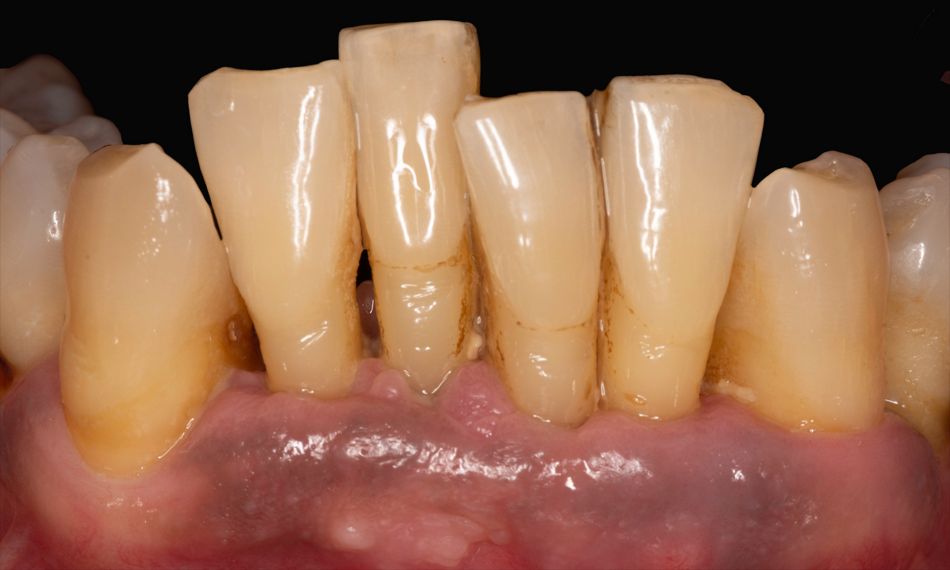
The intraoral examination revealed the absence of teeth #18, #28, #38, and #36. In addition, the clinical assessment showed mobility grade III, calculus, gingival inflammation, bleeding on probing, suppuration, and extrusions associated with teeth #32, #31, #41, and #42 (Fig. 1). Furthermore, large and bilateral bony masses in the premolar region of the lingual mandible were palpated.

The radiographic evaluation showed severe bone loss with intrabony defects on the anterior mandible. Additionally, bilateral well-defined ovoid radiopacities were observed superimposed over the mandibular canine and premolars roots compatible with torus mandibularis (Fig. 2).

The SAC classification was used because it provides an objective, evidence-based method for evaluating the potential difficulty, complexity, and risk of an implant-related rehabilitation related to individual implant dentistry cases simply and straightforwardly. It also aids clinicians in the selection of patients and treatment planning. The patient was classified as a complex surgical case and advanced in prosthodontic classification (Fig. 3).

Based on the radiographic and clinical findings, the patient was diagnosed with Stage IV grade C periodontitis. Teeth #32 – #42 were defined as hopeless, and tooth extractions were planned.

Treatment planning

Following a thorough discussion of the various treatment options with the patient, it was decided to proceed with a digital plan that included immediate implant placement supported by two implants. The workflow included the following steps:

  1. Extraction of hopeless incisors #32 – #42.
  2. Straumann® BLX Ø 3.5 mm SLActive® 10 mm implant placement at sites #42 and #31.
  3. Fill the gaps, bone defects, and adjacent sockets with Straumann® Xenograft. 
  4. Ensure primary stability, as it is paramount for immediate provisionalization.
  5. Delivery of screw-retained 4-unit temporary bridge. 
  6. Monitoring during the osseointegration period.
  7. Finalization with Zr Oxide and Li Disilicate 4-unit screw-retained bridge. 

A CBCT scan visualized with the planning software was recorded to assess the quality and quantity of bone available for implant placement. This planning included the evaluation of several views, analysis of the image data, and the placement of implants, abutments, and drilling sleeves (Fig. 4).

Fig. 4 (Online video available here)

The assessment revealed vertical and horizontal bone availability and the need for minor bone augmentation in the region of teeth #32-#42.

Surgical procedure

The patient was instructed to rinse her mouth with 0.12% chlorhexidine gluconate on the day of surgery. The surgical guide was placed and verified its stability and precision. Then, the anesthetic infiltration was done with 2% lidocaine and 1:100,000 epinephrine in the area corresponding to the lower incisors. Upon that, atraumatic extractions of the lower incisors were performed, and the sockets were thoroughly debrided and rinsed with tetracycline and saline. The digital 3D-printed initial drill surgical guide was placed in position for the initial drilling (Fig. 5).

The dedicated Straumann® BLX Surgical Cassette was used to prepare the implant bed. The patient presented type II bone, a thin cortical bone with a dense trabecular bone of good strength.

The anatomical situation was considered to decide the drilling protocol for this case. The guide was kept in its precise position, and, using the pilot drill ∅ 2.2 mm, the drilling procedure through the guide was then performed. The alignment pin was used to check the axis of the preparation, and initial peri-apical radiographs were taken. The last drill, Ø 2.8mm, was used, cooling with sterile saline solution at 800 rpm. However, the stability of the #32 site was not ideal; thus, the position was changed to #31.

The implant box was opened, and the blister’s seal was removed to access the implant vial. The vial was open with a counterclockwise turn, and the lid was released together with the implant. The vial lid was held and connected to the implant driver using the handpiece. A slight clockwise turn was then needed to remove the implant from its holder. Immediately after, two Straumann® BLX Ø 3.5 mm SLActive® 10 mm implants were inserted in positions #31 and #42, with the driver in the implant bed by turning it clockwise and taking into consideration a minimal distance of 1.5 mm from the implant adjacent tooth and 3 mm between the implants shoulders (mesiodistal). A final torque of 35Ncm was achieved, which allowed us to proceed with the immediate provisionalization (Fig. 6).

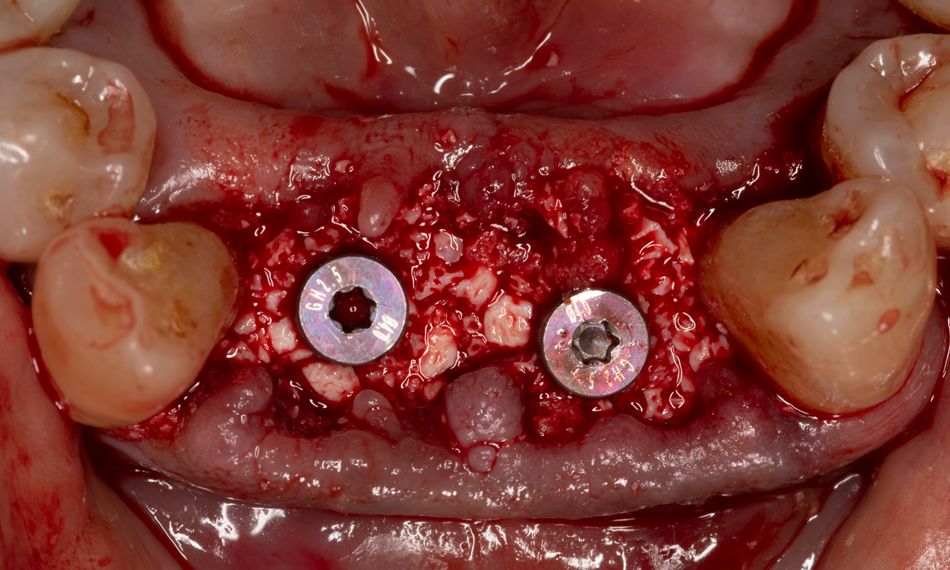
Straumann® Xenograft was placed to fill up the gaps of the bone defects, both buccally and lingually (Fig. 7). This biomaterial was used to ensure the implant's safe and long-term stability inside the bony compartment, as well as sufficient hard and soft tissue to ensure esthetics.

The mucoperiosteal flap was carefully closed with sutures, and the scan bodies were screwed on top of the implants. This area was scanned, and the data was sent off to the technician to design and print the temporary bridge (Fig. 8).

After 1 hour, the temporary bridge was inserted with minimal adjustment. The chimneys were closed, and the temporary bridge was intentionally not in complete occlusal contact to reduce the risk of excessive loading on implants. The patient was delighted with this immediate result (Fig. 9).

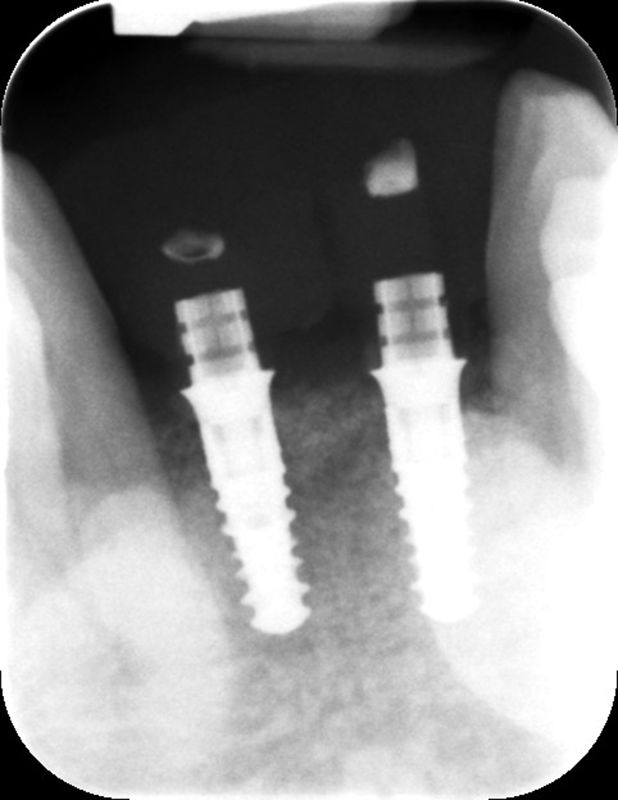
Finally, following our protocol, a periapical radiograph was taken after surgery and a provisionalization (Fig. 10).


Want to stay up to date?

youTooth.com is THE PLACE TO BE IN DENTISTRY – subscribe now and receive our monthly newsletter on top hot topics from the world of modern dentistry.


Prosthetic procedure

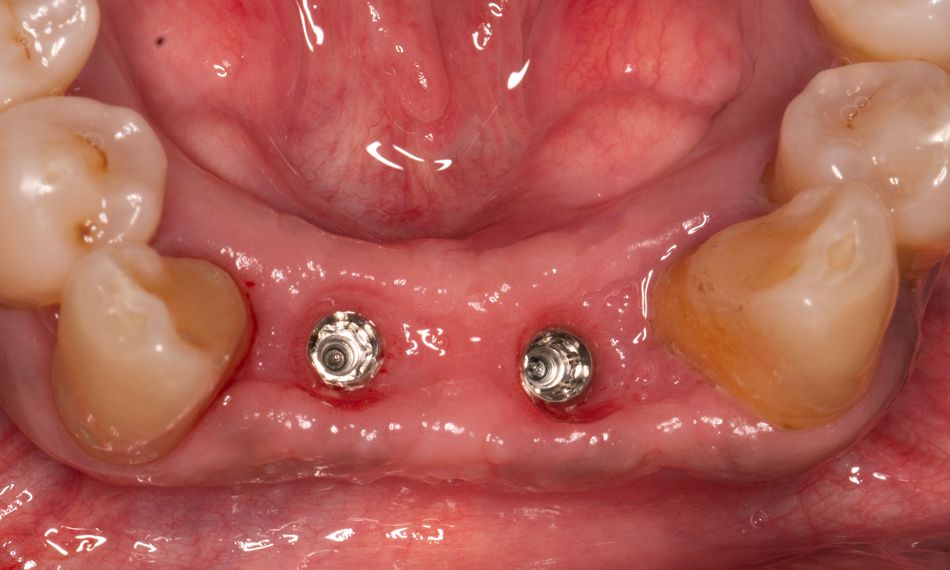
For the final restoration, three months after surgery, the provisional restoration was unscrewed. The intraoral examination demonstrated excellent soft tissue healing with an optimal emergence profile during the three-month follow-up visit after the surgery. The osseointegration of both implants was achieved, and the patient reported no mechanical or biological complications (Fig. 11).

Then, scanbodies were screwed on top of the BLX implants, and digital impressions using the 3Shape TRIOS® intraoral scanner were taken. Afterward, the STL files related to the impressions were imported into the digital software. The implants were virtually inserted into the model, and the Variobase® were placed on top of it.

The lab proceeded to prepare a final Zirconium bridge.

Treatment outcomes

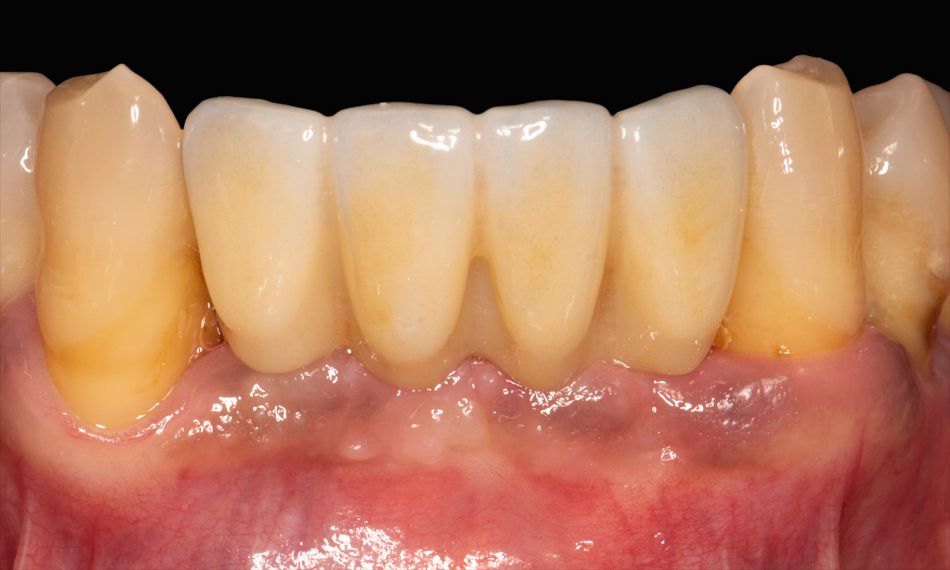
The final restoration was screwed, and the chimneys were sealed with Teflon and fluid resin. The occlusion was verified. The patient and our team were very satisfied with the outcome regarding health, aesthetics, and function. The final restoration resembled the adjacent teeth, which gave a natural look that the patient appreciated (Figs. 12-13).

Finally, a periapical radiographic of the final prosthesis was taken and stored as a baseline X-Ray to be used as a reference during the maintenance follow-up visits (Fig. 14).

The patient was enrolled in a yearly maintenance program, where clinical and radiographic assessments and oral hygiene instruction reinforcements were done. After 2.5 years, the patient did not report any biological or mechanical complications (Fig. 15).

Author’s testimonial

BLX is an implant designed to be efficient, aggressive and yet simple and easy to use for immediate placement. It allows a high torque value which often is necessary for immediate placement due to minimal drilling protocol and for immediate provisionalization. The prosthetic solutions have been well thought out for digital workflow in full, from surgery to immediate temporaries and the permanent prosthesis. It has changed my workflow for immediacy due to its flexibility and ease of use digitally.