Bimaxillary rehabilitation with
Axiom X3® Tissue Level implants

Dr. Jean-Baptiste VERDINO
Dental Surgeon
Hyères, France
- Exclusive practice in implant surgery and prosthodontics
- Former hospital-university assistant
- DEA in surgical sciences
Prosthetic restoration: Mr Jean-Michel MOAL
Case introduction
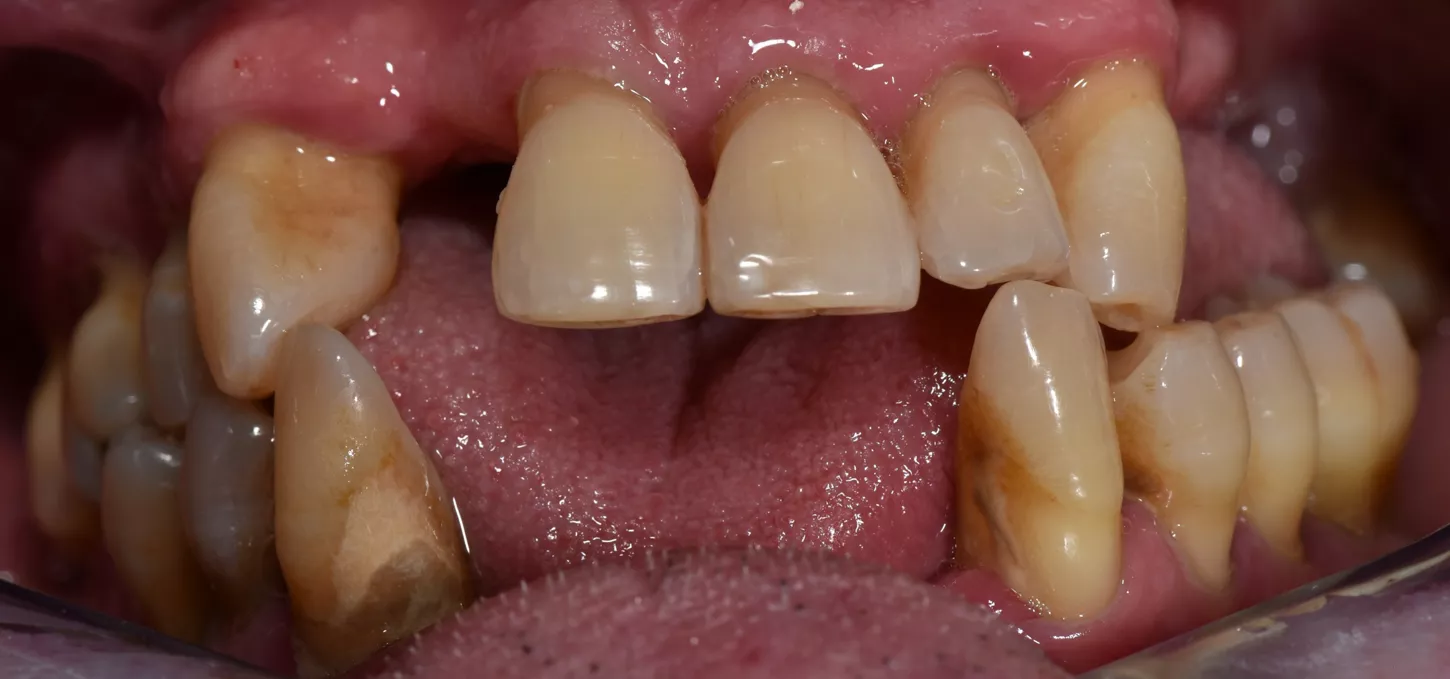
A 55-year-old patient with no medical history or ongoing treatment, a non-smoker, presents for consultation with the desire to address aesthetic and functional issues. The examination reveals missing teeth, a disturbed occlusal plane, extrusions, and versions of residual teeth.
The proposed treatment plan includes the extraction of all remaining teeth, the immediate placement of 6 implants in the upper jaw, and 4 implants in the lower jaw. Due to unfavorable periodontal conditions, the use of tissue-level implants is necessary. Their design promotes the formation of an epithelio-connective barrier above each implant, ensuring natural protection of peri-implant bone tissues.
Initial situation
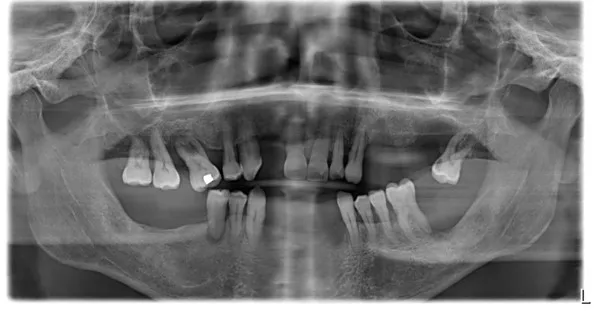
1. OPG showing peri-dental bone involvement and sufficient residual bone for implant placement.
2. Aesthetic and functional deficit due to tooth loss.
3. Preparing temporary bridges: mounting models on articulators, sectioning teeth.
4. Preparation of 2 surgical guides in transparent resin.
5. Preparation of the 2 full arches, ready for connection to the temporary cylinders.
Surgery
6. A flap is raised in the lower anterior area, revealing the thinness of the residual ridge. It will be abraded to achieve a surface compatible with implant insertion.
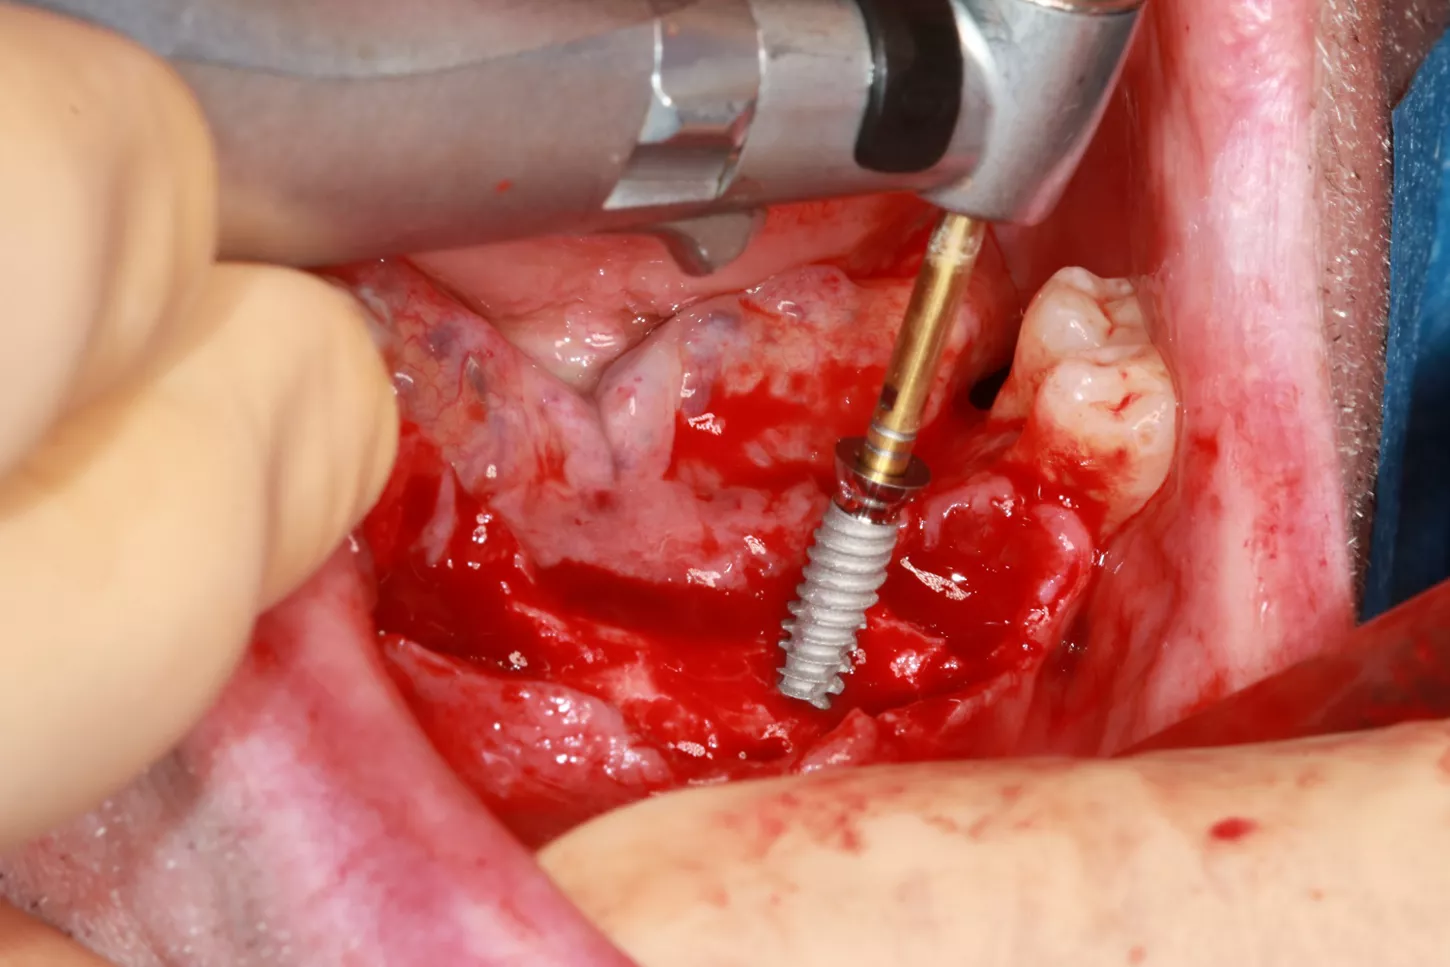
7a. 7b. 7c. 7d. Drilling protocol with underpreparation: the first 2 drills reach the working length, and the red drill is used on the first 2/3 millimeters to facilitate implant guidance. As the mechanical strength of 3,4mm diameter implants is comparable to that of 4mm implants, the former are chosen to maintain peri-implant bone volume. Axiom X3® TL implants, 3,4 x 12mm, collar height 2,5mm, are placed. Note that residual teeth are retained to guide the position and axis of the implants.

Curious about Axiom X3® Tissue Level?
Benefit from the best of Axiom X3® design in a Tissue Level clinical approach.
8. Placement of an Axiom X3® Tissue Level implant 3,4x12mm.
9a. 9b. The same drilling protocol is applied to the upper jaw.
10. The extraction site doesn't allow for a 3,4mm diameter implant. A 5,2mm diameter implant is used to achieve primary stability at 35 N.cm.
11a. 11b. 11c. 11d. Straight Multi-Unit abutments 0,75mm high and 4,8mm in diameter are placed on each implant to facilitate bridge placement.
Prosthetic restoration
12a. 12b. Plaster impressions of the 2 arches to ensure perfect passivity.
13. Production of working models with false gingiva to facilitate the design of bridges in contact with the gingiva.
14. Mounting models on articulators.
15. Connection of the 2 arches to provisional abutments.
16. The 2 bridges are designed with an external convex morphology to facilitate cleaning.
Final situation
17a. 17b. Placement of bridges without constraint.
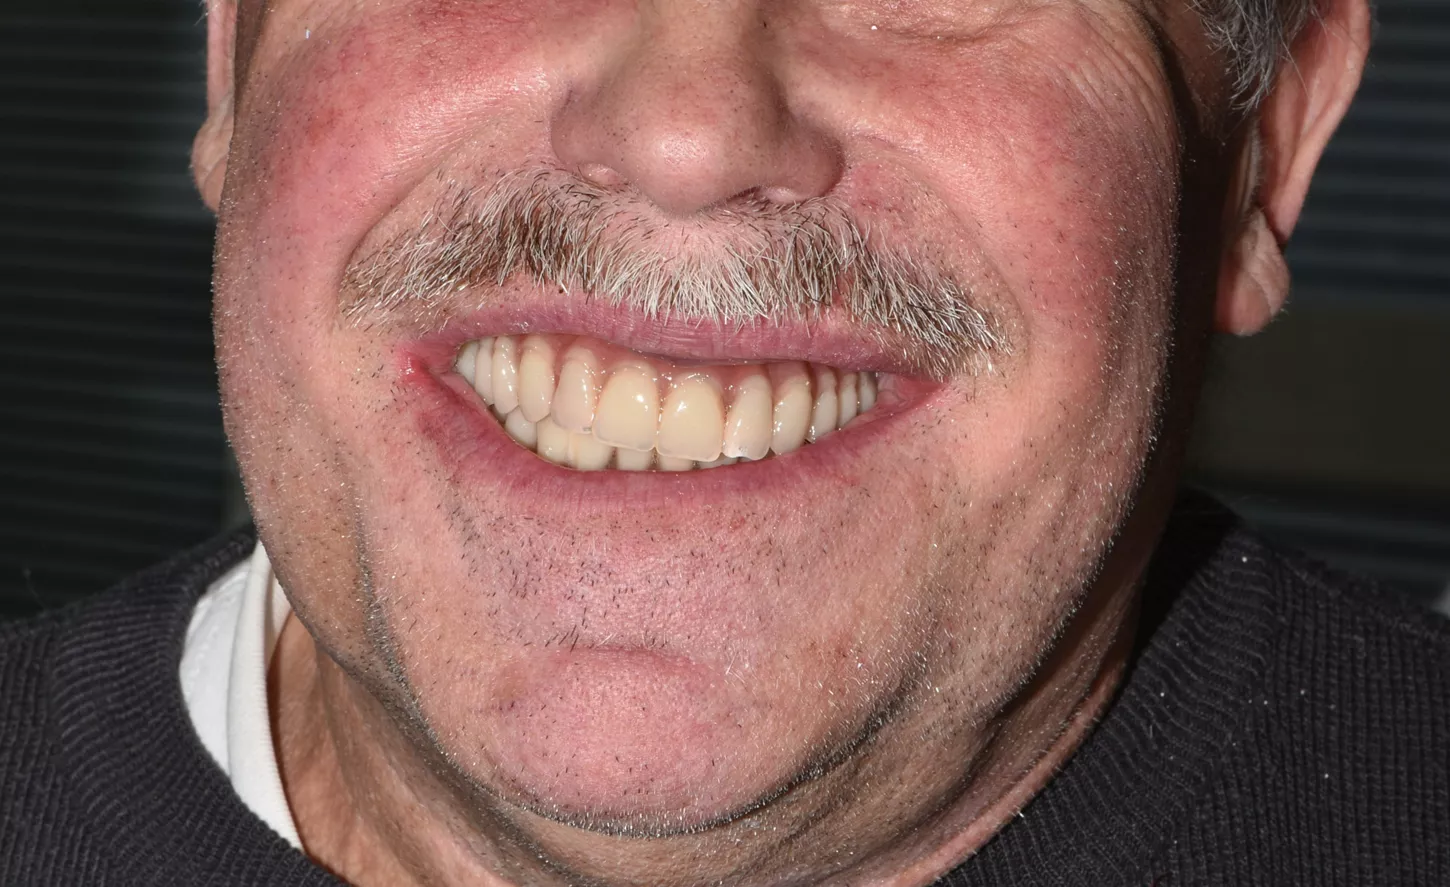
18. Patient's smile 3 hours after surgery.
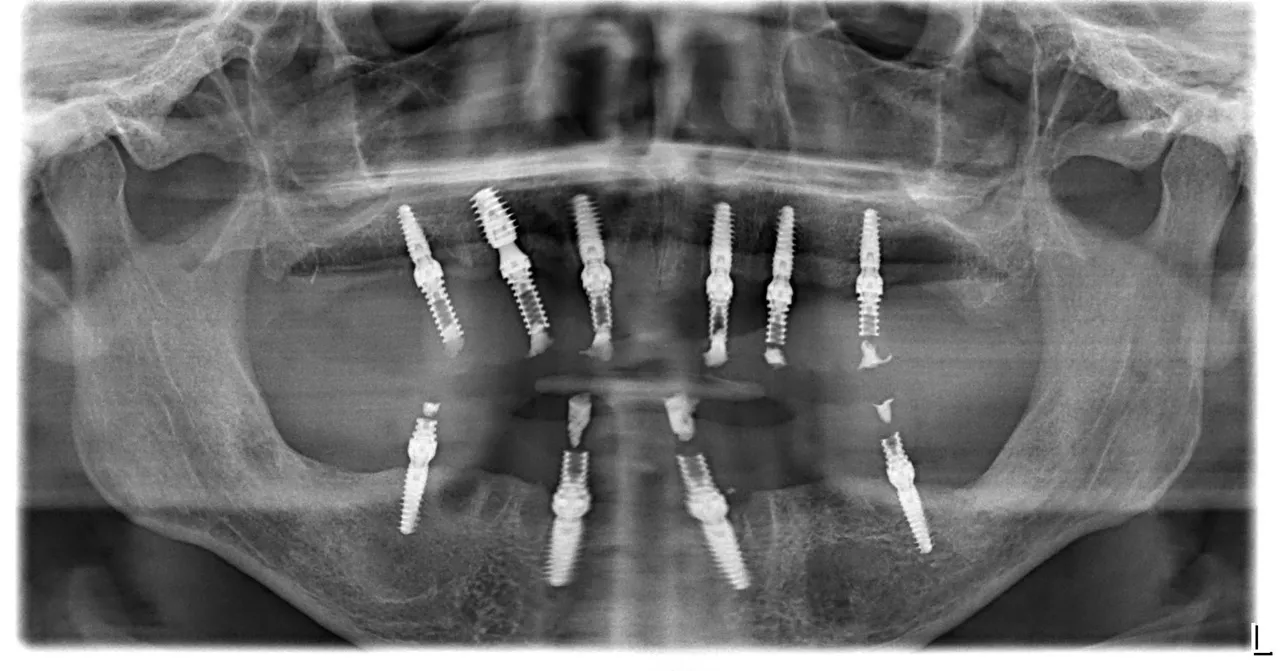
19. Radiographic control (OPG) showing the perfect adaptation of bridges after screwing.
Conclusion
In this clinical case, the use of Axiom X3® Tissue Level implants was an asset on several levels. The design of the coils enabled primary stability of 35 N.cm to be achieved at each site, with only the drilling protocol changing according to the bone density encountered.
The unique shape of the transgingival part of the implant ensures that, after healing, an epithelial-conjunctive collar protects the underlying bone. Multi-Unit abutments for Axiom X3® TL implants enabled us to return to our usual working conditions.